Placing a circle
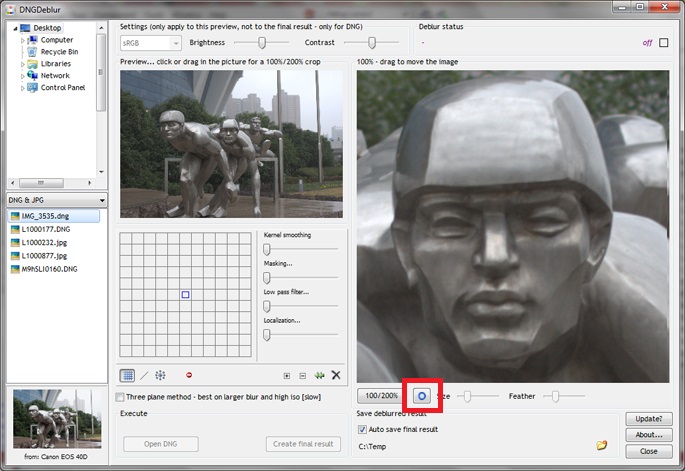
To place a circle on the photo, you first have to switch on the deblurring circles, by clicking the button outlined in red in the next screenshot.
 Button to turn on the deblur circle mode...
This circle button is an on / off button, and as long as it stays down, you are in 'deblur circle mode'. In that mode, the cursor is changed into a circle, as soon as you move your mouse over the bigger preview image. You then cannot drag the image with your mouse anymore (no more hand symbol).
To place a circle anywhere (after switching to deblur circle mode with the button), move the circle over the bigger preview and click with the left mouse button once, when you have the right position. At that point a circle will appear on the photo. You can place more than one circle: simply click again with the left mouse button.
The placed circle (and the cursor) will always be a fixed size. You can only change the size of the circle after it's placed on the photo.
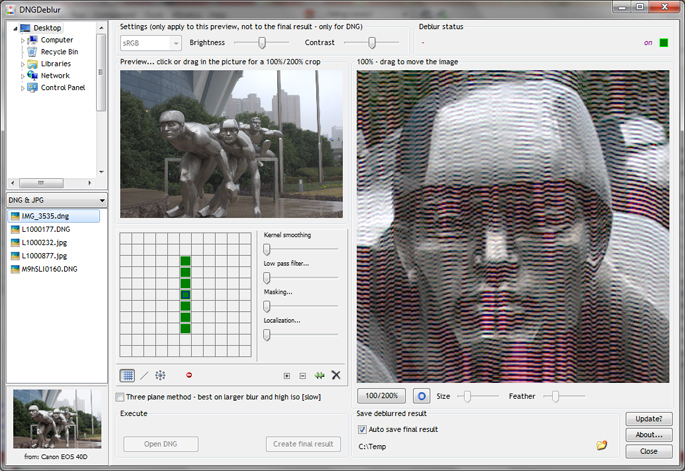
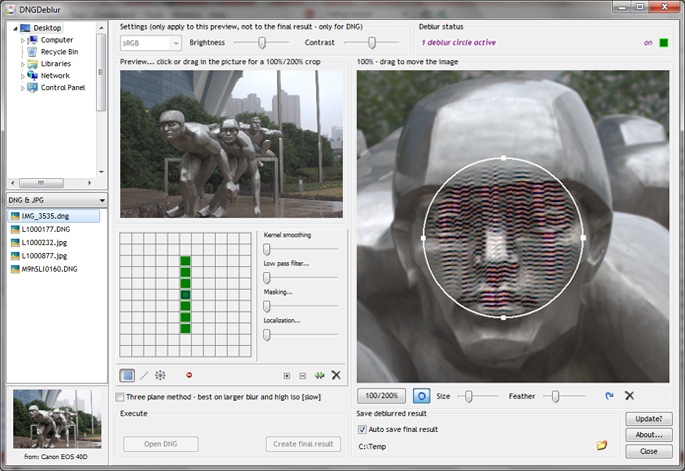
Any deblurring you have done to the photo will at this point only be visible within the placed circle(s). See the next two screenshots, where I deliberately made the deblurring somewhat horrible, so you can see what happens after placing a circle.
 No circles placed, the whole photo is deblurred (ugly deblurring shown deliberately)...
 One circle placed, the deblurring is confined (ugly deblurring shown deliberately)...
Since you cannot drag the bigger preview image in deblur circle mode, if you need a circle on a part of the photo that's not visible, the easiest way is to navigate that part into view with the smaller preview image.
Selecting a circle
Before you can change the size of a circle or change its feathering, you have to select it. You can select the circle you want to change by clicking in it with the left mouse button. A selected circle has a thicker edge and shows four handles.
Moving a circle
You can move a circle by clicking in it with the left mouse button and holding the button. Then you can drag the circle to another position.
Resizing and feathering a circle
Next to the circle button (see first screenshot) you'll find two sliders. One is to increase or decrease the size of the selected circle, the other is to feather the selected circle. Note that the feathering works inwards and that every circle can have its own amount of feathering.
You can change the overall size of the circle with the slider, but you can also change the shape (and / or size) of the circle with the four handles on the edge of a selected circle.
If you do want to see the outline of the circles, but you don't want any of them selected, click the button next to the feather slider.
If you don't want to see the outline of the circles, click the 'deblur circle mode' button again so it switches off. You'll get back to the mouse hand (so you can drag the image) and you won't see the outline of the circle(s) anymore. However, the deblurring is still confined within the now invisible circles.
Deleting a circle
To delete a circle, make sure it's selected by clicking in it. Then click the delete button under the big preview picture. If you only had one circle, the deblurring will now be back to the total image.
Some remarks
The size and feathering are specific to each individual circle (meaning you can resize and feather every circle individually), however, all circles will use the same deblurring, set through the deblurring filter. Currently it's not possible to have a different type of deblurring per circle.
In the deblur status, on top of the bigger preview, you can see how many circles are placed on the photo.
The deselect and delete buttons, under the bigger preview, are only visible if there's a selected circle. The size and feather sliders are only enabled if there's a selected circle.
Download
You can download DNGDeblur here.
Previous posts about the specifics of DNGDeblur:
- User Interface II
- User Interface I
- Introduction

No comments:
Post a Comment