
Next few screenshots might be unnecessary and self explanatory to most users, the program is not that complicated, but well, let's do this anyway. Just follow the red squares.
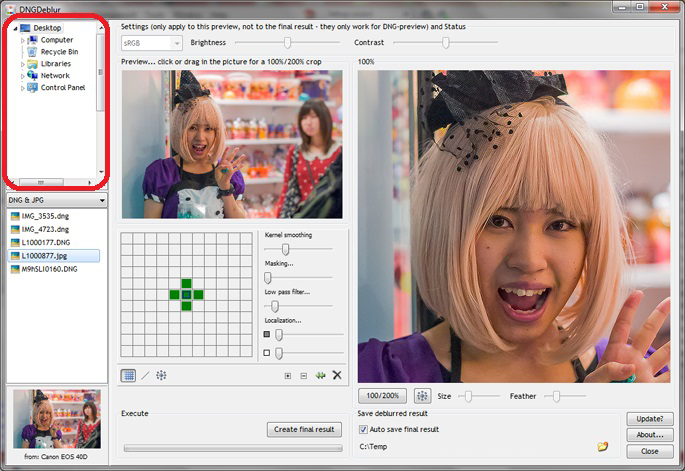 In this list you select the folder your DNGs or JPEGs are residing...
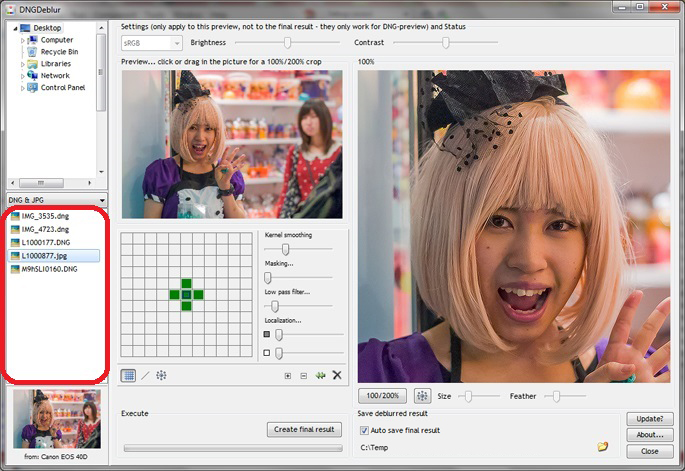 The DNGs and or JPEGs will then show up in this list...
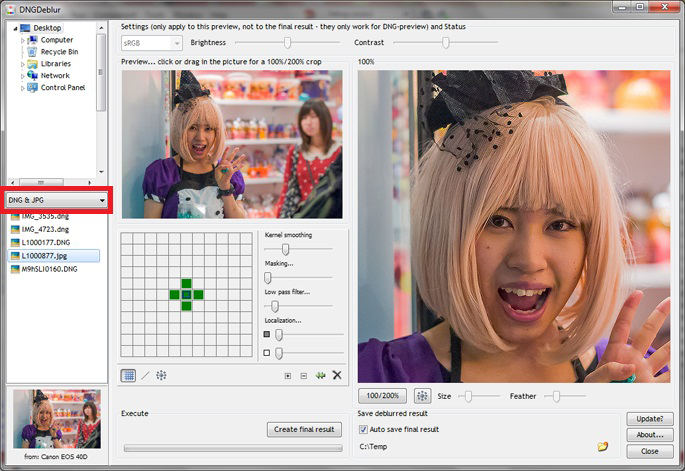 In the middle you can select if you want to see DNGs and JPEGs, or only DNGs or only JPEGs...
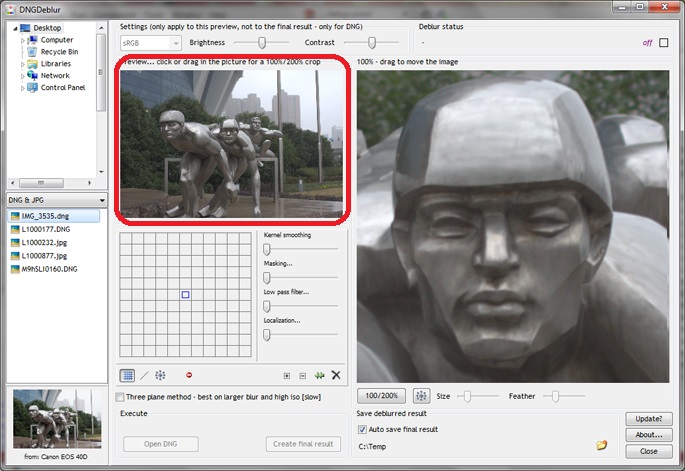
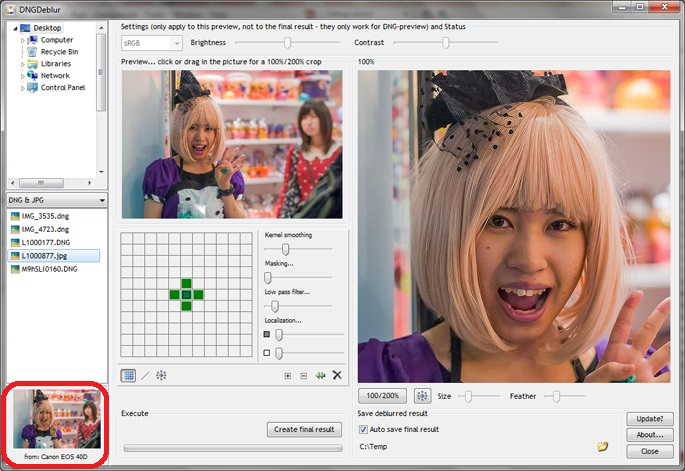 When you select a DNG or JPEG, you will see the preview image here... under it the camera model the photo was taken with. Note though that for JPEGs you will not see the camera model (yet), but an indication if the JPEG is 8-bits or 24-bits per pixel. This screenshot is from an earlier version and shows one of those many bugs I'm still solving, since it's a JPEG selected and this photo was not taken with the Canon 40D...
JPEG versus DNG selection
When you select a JPEG, it's loaded into the program almost instantly. So you will not only see the little preview - indicated in the previous screenshot - but also the bigger images. You can start to work on the photo almost immediately.
But when you select a DNG it first needs to be interpolated to get to a presentable result. That takes some time and it takes too long to do it automatically (then you would be stuck navigating the photo list every time you hit a DNG). So when you select a DNG, you first have to click the 'Open DNG' button, shown in the next screenshot, before you can start working on the photo.
 When you select a DNG you have to click 'Open DNG' before you can start working on the photo. This button won't show if you select a JPEG.
Be aware that the program currently resets everything - without warning - when you select another photo in the list on the left. You will lose any deblurring you have done if you have not created the final result.
Navigating
After clicking the 'Open DNG' button (or selecting a JPEG), you can navigate the photo by clicking or dragging with your mouse in the smaller preview image on top. It will show you the 100% view of your selection on the right. You can also directly move the bigger image on the right, by dragging the image with your mouse (DNGMonochrome users: this will also be in the next version of DNGMonochrome).
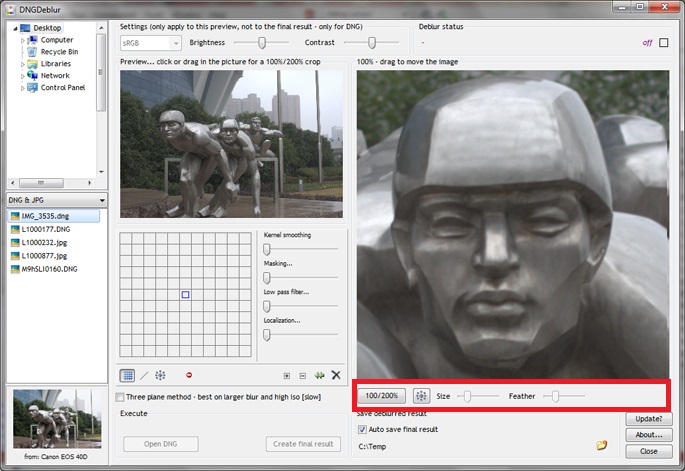
 Drag or click in the smaller image to show a 100% view of your selection on the right... You can also drag the big image around with your mouse...
Under the bigger image you have several buttons. With the first one you can switch between a 100% and a 200% view. The other buttons and sliders have to do with the deblurring circles. I'll come back to those later.
 Buttons and sliders under the big image...
Saving or auto saving the final result
When you're happy enough with your deblurred result, you can click 'Create final result', after which DNGDeblur starts to work on the total image. Note that the button 'Create final result' is not available until there's actually some deblurring going on. If you have turned on 'Auto save result' and set a folder, the end result will be saved into that folder automatically. If you have not turned on auto save, DGNDeblur will open a Save dialog when the deblurring process is finished, and you can save the result manually.
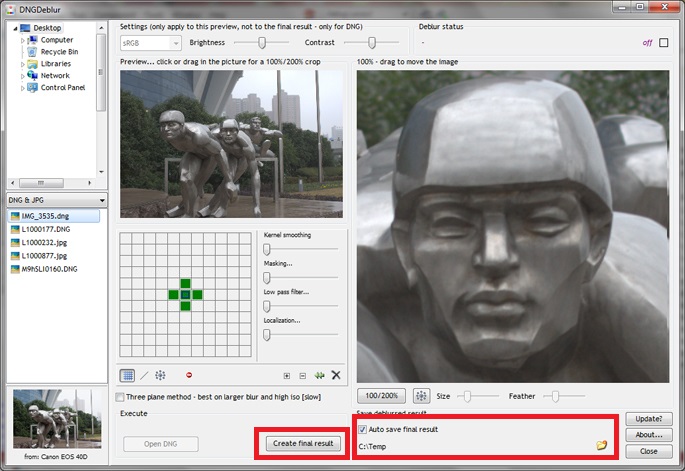 Click the 'Create final result' to produce the deblurred photo, which is then saved automatically if you have turned on 'Auto save', with a valid folder...
The deblurring filter
Obviously, this is the thing everything revolves around. It consists of three parts (for DNGMonochrome users who had a look at the deblurring filter in DNGMonochrome, also this will be in the next version).
The free grid

The line and other shapes tool

The circle - mainly for focus blur

You can switch between the three with the buttons under the filter. Note that currently the line and circle tool (if you switch from the free grid) will destroy anything you did in the free grid. I hope to address that in future versions.
In the free grid you can just click around to create the so called 'kernel'. In the line tool you select the shape and set the radius and angle. In the circle tool it's just the radius.
More technical
The deblurring is based on Wiener filtering. Now, I am not a mathematician and if I try to explain in detail, I will probably make gross mistakes, because I do not understand those rather complex mathematical formulas that go along with it, so for what it's worth - and as far as I understand it - in layman's terms: think of this type of filtering as a form of noise cancellation, like the one they implement nowadays in some head phones. Noise and unwanted sounds from your environment - that do not belong to the audio signal - are blocked, by generating 'anti sound' (since waves can cancel each other out - interference and all that).
So one could say that Wiener filtering for deblurring images, uses 'anti waves', to block out the residue in the image that's left behind by camera shake or focus errors. This is done by first transforming the image through Fast Fourier, and then combining its energy spectrum with the energy spectrum of the 'kernel' (where the kernel is the image you have created by clicking in the free grid or by selecting a shape in the line or circle tool, also transformed through Fourier).
So the kernel is the bit that's creating the anti waves.
Another shorter explanation - probably more correct, but also more vague - could be that Wiener filtering is a method of shaping the energy spectrum of your blurry image - towards a less blurry outcome - with the help of the energy spectrum of the kernel. Almost like a sculptor chiseling away at the photo, where the kernel is your chisel.
Or as the smart people of Wikipedia put it:
"The goal of the Wiener filter is to compute a statistical estimate of an unknown signal using a related signal as an input and filtering that known signal to produce the estimate as an output."
Which is even more vague, basically telling you nothing about what's actually happening. So I hope my own explanation isn't too far off.
But you can already guess the problem: finding the right kernel! If you have no record of how the shake went exactly (or when your subject was also moving), finding the right energy spectrum to correct your blur is not a simple task. That's why this method works quite well on small focus blur or mild camera shake (since the kernel can then be quite generic: a short line, a cross, or a circle and the whole thing then starts to act as some kind of super sharpener). But when the blur becomes more complicated, it's a different story. Then this method becomes more frustrating. And then I haven't even talked about 3D blur, where you didn't just shake the camera a bit, but where you were also moving back and fro at the same time.
This is one reason why I introduced the free grid (to give you and me a fighting chance), since some of the deblurring software out there stops at the line and the circle. But just the line or circle do not necessarily give you the best result for your particular bungled up photo.
I also think the free grid lends itself quite well for some automation I've been experimenting with: trying to estimate the best kernel based on an underlying comparison of the result. It's a very slow procedure, but some of the results have been quite encouraging. I hope to introduce that automation at some point in future versions.
Next post I will go a bit deeper into the workings of the free grid and the sliders.
Download
You can download DNGDeblur here.
Previous post about the specifics of DNGDeblur:
- Introduction
No comments:
Post a Comment