Friday, October 31, 2014
Thursday, October 30, 2014
Yet another slider?
Another break in the deblurring business. It will lead to one more slider in the filter, but this might be the 'fix almost all' slider I've been searching for.
The sad part is that I ventured on this solution much earlier, but gave up on it, since the results were not great. The idea was to put a gaussian function over the kernel and thus soften the kernel image towards the edges. But I couldn't get to the right gaussian and make it flexible and fast enough to scale with the radius of the kernel. Besides, the results didn't seem very good anyway on kernels with a small radius - most likely the gaussian dropped off too steep or not steep enough - so I gave up on the idea.
Yesterday I came back to it, still thinking there should be a noticeable difference when lowering the kernel values from the center outwards, so I decided to try a linear approach. Simply lower the values the further they are away from the center, without the curve of a gaussian. And that indeed gave the results I was looking for.
Much of the grosser distortions dropped away, without the need to slide a lot anymore with any of the other sliders. The motion deblurring with the line became a lot more effective, and so did the focus deblurring. And in the free grid, some combinations that before would lead to very big distortions suddenly became usable.
Let me show you an example... this kernel leads to the distortions shown in the photo under it...
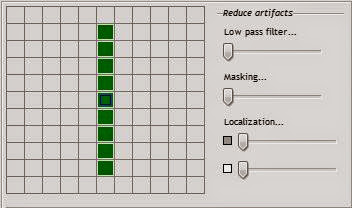
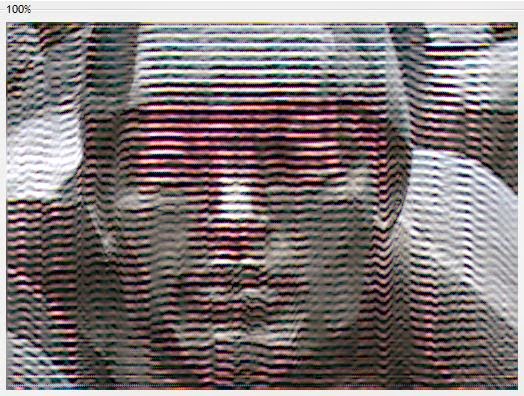
Now with the new slider activated and without any changes to the other sliders...
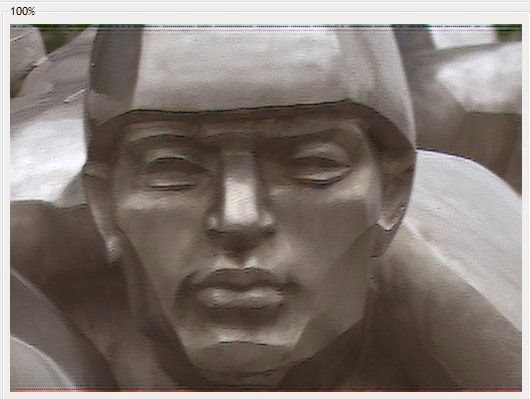
And although this is not an endresult (a bit of sliding with the other sliders is still necessary), it's for this kernel a result I wasn't able to achieve with only the other sliders.
In combination with the deblur circles (actually they are ellipses now) I think I have a much more workable piece of software.
I know... me droning on about it without you being able to try it is frustrating, but it will be released soon. The deblur circles are finished (last step was to be able to turn them into ellipses) and this new slider will most likely be finished this week. Then there's some cleaning up and running some tests to see if I have all the details right, but that shouldn't take up too much time.
The sad part is that I ventured on this solution much earlier, but gave up on it, since the results were not great. The idea was to put a gaussian function over the kernel and thus soften the kernel image towards the edges. But I couldn't get to the right gaussian and make it flexible and fast enough to scale with the radius of the kernel. Besides, the results didn't seem very good anyway on kernels with a small radius - most likely the gaussian dropped off too steep or not steep enough - so I gave up on the idea.
Yesterday I came back to it, still thinking there should be a noticeable difference when lowering the kernel values from the center outwards, so I decided to try a linear approach. Simply lower the values the further they are away from the center, without the curve of a gaussian. And that indeed gave the results I was looking for.
Much of the grosser distortions dropped away, without the need to slide a lot anymore with any of the other sliders. The motion deblurring with the line became a lot more effective, and so did the focus deblurring. And in the free grid, some combinations that before would lead to very big distortions suddenly became usable.
Let me show you an example... this kernel leads to the distortions shown in the photo under it...


Now with the new slider activated and without any changes to the other sliders...

And although this is not an endresult (a bit of sliding with the other sliders is still necessary), it's for this kernel a result I wasn't able to achieve with only the other sliders.
In combination with the deblur circles (actually they are ellipses now) I think I have a much more workable piece of software.
I know... me droning on about it without you being able to try it is frustrating, but it will be released soon. The deblur circles are finished (last step was to be able to turn them into ellipses) and this new slider will most likely be finished this week. Then there's some cleaning up and running some tests to see if I have all the details right, but that shouldn't take up too much time.
Labels:
DNGDeblur
Wednesday, October 29, 2014
DNGMonochrome 0.9.83 released
Because with some changes new bugs are introduced... so, some bugfixes in this new release.
Download
You can download the new version of DNGMonochrome here.
- Fixes the result when converting with the 'no interpolation - resize' option not acting properly in the new 200% Tools preview
- Fixes the result when converting with the 'no interpolation - resize' option deblurring too slow in the Tools preview
- Fixes the full red result and full blue result when converting with the 'no interpolation - resize' option not deblurring at all in the Tools preview
Download
You can download the new version of DNGMonochrome here.
Labels:
DNGMonochrome
Tuesday, October 28, 2014
DNGMonochrome 0.9.82 released
Some small changes and an important bugfix in this new release.
Download
You can download the new version of DNGMonochrome here.
- Splits the localization slider in the deblurring filter into two sliders: one for dark/midtones, and one for highlights... this gives more control over the deblurring distortions...
- In anticipation of the new 'deblurring circles' (not yet available), the 200% preview in the Tools window is dropped, and the 100% preview is enlarged and can be switched to 200%
- Fixes a memory bug that could lead to a 'whoa, that's a bug' notification after deblurring the same photo (in full) several times in one session
- Fixes gamma not changing for the small preview picture in the Tools window
Download
You can download the new version of DNGMonochrome here.
Labels:
DNGMonochrome
Monday, October 27, 2014
Performance
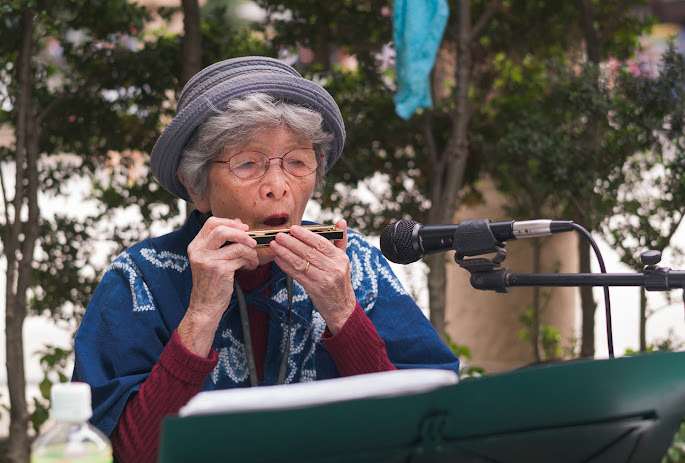 Elderly lady performing... not too bad either...
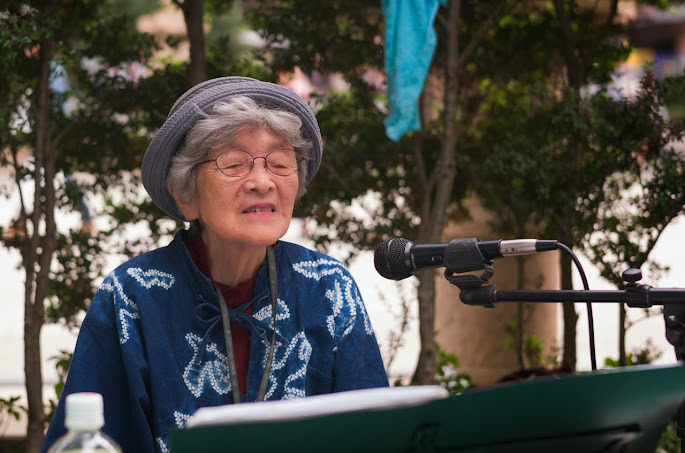 After her performance... quite content...
Notice also she's wearing indigo blue, also called 'Japan blue'. It's a bit of a traditional color in Japan - a dye made from the Indigo plant - and once you know that and pay some attention to it, you start seeing it everywhere in Tokyo...
Tokyo, Japan, 12 October 2014
Click on photos for the full version...
Labels:
japan,
leica M9,
summilux 50mm f/1.4,
tokyo
Sunday, October 26, 2014
A bit gruesome
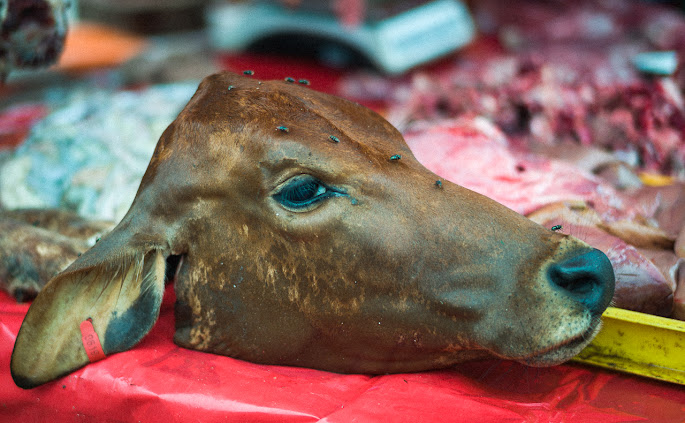 Well, this has nothing to do with Japan. A shot I took a few weeks ago, at a pasar malam (night market) in Malaysia and it's a bit gruesome, especially after the wedding photo of yesterday.
These night markets are usually fun to walk around on - although after a few you know what to expect - and so was this one, but the scene captured on the photo above I had never seen before on any of the other markets. It struck me for several reasons. Of course, one of the reasons being that where I come from and where I shop, the meat is neatly packaged and unrecognisable. When buying at this butcher on the pasar malam, you don't get away with the ignorant supermarket bliss, never realising that the meat behind the shiny plastic once had a head. Although I don't think the butcher put it there for that reason. Most likely he wanted to show some degree of freshness to the kill, which might have helped to sell the other parts of the cow also on display in several trays behind the head.
But I was fascinated with the head for another reason: the eyes were still open, and it actually looked not dead at all. Rather peaceful I thought. Like it could any moment let out a satisfied 'moo' - such a nice pasar malam - or lick its lips and nose with its wet tongue (assuming the tongue was still in there). And those two things - the severed head, death and destruction, in combination with this peaceful look - was what fascinated me the most about this scene. Then I realised I had no idea how a non peaceful look would show on a dead cow's head and I snapped a photo.
You can click on the photo for the full version, but I understand if you do not wish to do so...
Malaysia, 3 October 2014
Labels:
leica M9,
malaysia,
summilux 50mm f/1.4
Saturday, October 25, 2014
Thursday, October 23, 2014
Tuesday, October 21, 2014
DNGDeblur
I know I promised it a while ago (deblur color DNGs) and I can assure you it's not turning into vaporware. In fact, I've been using it on some of the recent photos from Tokyo shown on this blog.
But when I was using DNGDeblur in its unfinished state, I realised I needed additional functionality, mainly the option to deblur only part of the DNG. That's now finished. You can place what I call 'deblur circles' on the photo, and then any deblurring done, stays confined within those circles (which can be moved around, changed in size and feathered, a bit like the healing or cloning circles in Lightroom). The advantage is that if you only want to deblur a face or the eyes of a face, you now can (well, I can, you not yet), without touching the rest of the photo.
One of the photos I used this method on was published a few posts back, here, the old women in the riksja.
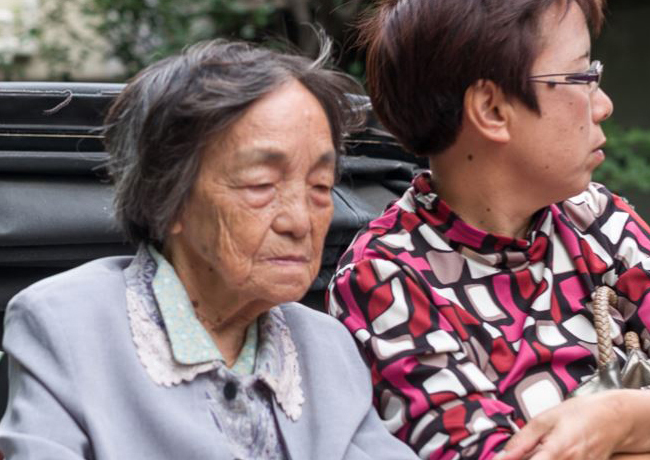
100% crop from a 1280px jpg based on an M9 color DNG, in this state a rather unusable photo... note that this is a real life shot, not some fake blurred image (sadly, because it indicates quite a bit of user error)... Move over the image with your mouse to see the blur corrected version produced by DNGDeblur...
So I placed the circle over her face, deblurred, and then developed the resulting DNG into a 1280px JPG. The advantage being that none of the other parts of the photo got deblurred (no distortions anywhere else in the photo). It saves a lot of checking around to make sure other parts of the DNG don't start to act funny. I can now concentrate on the part I need to concentrate on to get the DNG more presentable.
Now in practice, the true 100% image after deblurring isn't great and after quite some experimentation I figured out that it seems to be ok to have some distortions in the end result as long as the resulting JPG gets downsized compared to the original size. Fifty percent seems doable.
I won't put any dates on the release of DNGDeblur, but it will be there eventually. I will most likely also incorporate these 'deblur circles' in the deblurring filter of DNGMonochrome in a next version.
But when I was using DNGDeblur in its unfinished state, I realised I needed additional functionality, mainly the option to deblur only part of the DNG. That's now finished. You can place what I call 'deblur circles' on the photo, and then any deblurring done, stays confined within those circles (which can be moved around, changed in size and feathered, a bit like the healing or cloning circles in Lightroom). The advantage is that if you only want to deblur a face or the eyes of a face, you now can (well, I can, you not yet), without touching the rest of the photo.
One of the photos I used this method on was published a few posts back, here, the old women in the riksja.

100% crop from a 1280px jpg based on an M9 color DNG, in this state a rather unusable photo... note that this is a real life shot, not some fake blurred image (sadly, because it indicates quite a bit of user error)... Move over the image with your mouse to see the blur corrected version produced by DNGDeblur...
So I placed the circle over her face, deblurred, and then developed the resulting DNG into a 1280px JPG. The advantage being that none of the other parts of the photo got deblurred (no distortions anywhere else in the photo). It saves a lot of checking around to make sure other parts of the DNG don't start to act funny. I can now concentrate on the part I need to concentrate on to get the DNG more presentable.
Now in practice, the true 100% image after deblurring isn't great and after quite some experimentation I figured out that it seems to be ok to have some distortions in the end result as long as the resulting JPG gets downsized compared to the original size. Fifty percent seems doable.
I won't put any dates on the release of DNGDeblur, but it will be there eventually. I will most likely also incorporate these 'deblur circles' in the deblurring filter of DNGMonochrome in a next version.
Labels:
DNGDeblur
Monday, October 20, 2014
Sunday, October 19, 2014
Saturday, October 18, 2014
Riksja
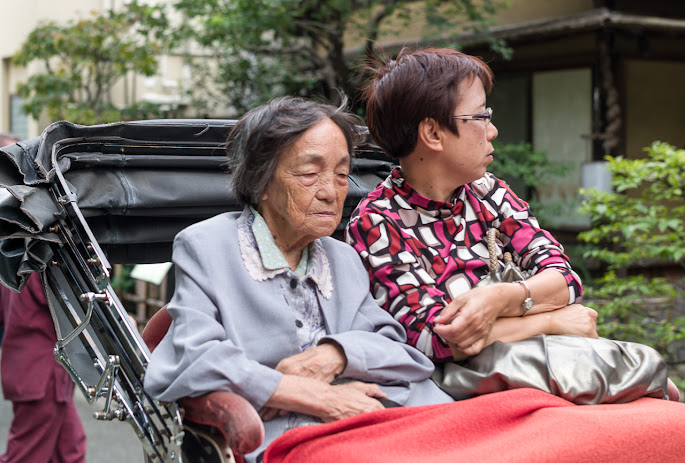 In Asakusa... these riksjas are being pulled by tall and fit looking Japanese guys with strange footwear (shoes shaped as reindeer hoofs)... They also act like a tour guide and will tell you some facts about the area and stop at the landmarks...
 The old women didn't seem to be that interested though, but who can blame her...
Tokyo, Japan, 9 October 2014
Click on photo for the full version...
Labels:
asakusa,
japan,
leica M9,
summilux 50mm f/1.4,
tokyo
Friday, October 17, 2014
Thursday, October 16, 2014
Spider
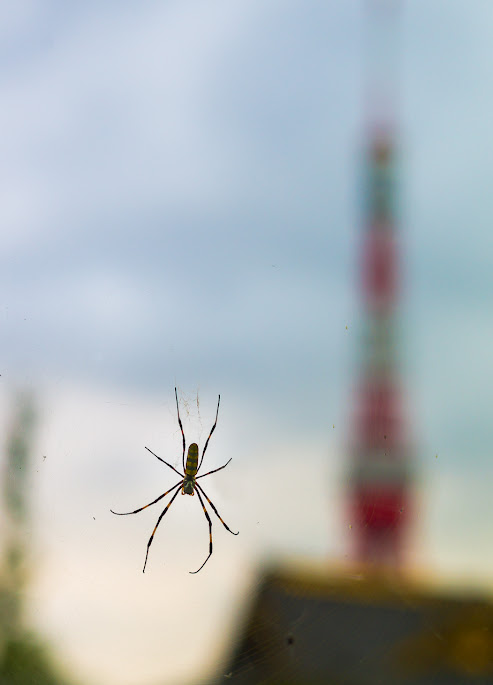 You see them in parks... they are big and look vicious, and they wear a black and yellow wasp suit - adding to the concern - but I have no idea if they're actually dangerous... Tokyo Tower in the background...
Edit: after some research I think it's a Nephila clavata. Its bite is not lethal apparently, just gives some blistering and local discomfort for about 24 hours. But don't take my word for it, I'm no spider expert, and I'm still unsure if I have the right one...
Tokyo, Japan, 9 October 2014
Click on photo for the full version...
Labels:
japan,
leica M9,
summilux 50mm f/1.4,
tokyo
Wednesday, October 15, 2014
Subscribe to:
Comments (Atom)


