Tuesday, October 21, 2014

DNGDeblur

I know I promised it a while ago (deblur color DNGs) and I can assure you it's not turning into vaporware. In fact, I've been using it on some of the recent photos from Tokyo shown on this blog.

But when I was using DNGDeblur in its unfinished state, I realised I needed additional functionality, mainly the option to deblur only part of the DNG. That's now finished. You can place what I call 'deblur circles' on the photo, and then any deblurring done, stays confined within those circles (which can be moved around, changed in size and feathered, a bit like the healing or cloning circles in Lightroom). The advantage is that if you only want to deblur a face or the eyes of a face, you now can (well, I can, you not yet), without touching the rest of the photo.

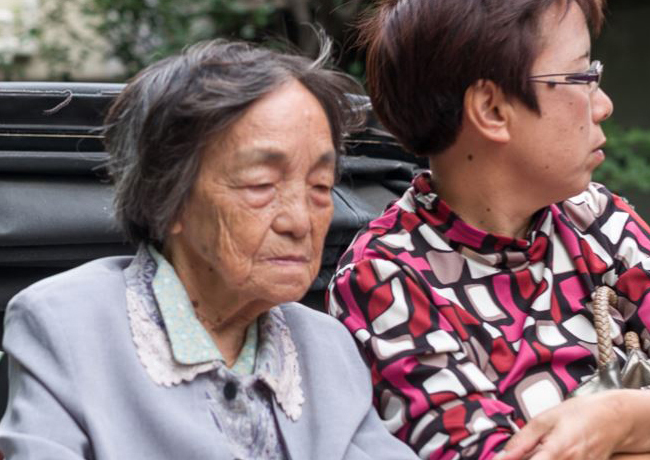
One of the photos I used this method on was published a few posts back, here, the old women in the riksja.


100% crop from a 1280px jpg based on an M9 color DNG, in this state a rather unusable photo... note that this is a real life shot, not some fake blurred image (sadly, because it indicates quite a bit of user error)... Move over the image with your mouse to see the blur corrected version produced by DNGDeblur...

So I placed the circle over her face, deblurred, and then developed the resulting DNG into a 1280px JPG. The advantage being that none of the other parts of the photo got deblurred (no distortions anywhere else in the photo). It saves a lot of checking around to make sure other parts of the DNG don't start to act funny. I can now concentrate on the part I need to concentrate on to get the DNG more presentable.

Now in practice, the true 100% image after deblurring isn't great and after quite some experimentation I figured out that it seems to be ok to have some distortions in the end result as long as the resulting JPG gets downsized compared to the original size. Fifty percent seems doable.

I won't put any dates on the release of DNGDeblur, but it will be there eventually. I will most likely also incorporate these 'deblur circles' in the deblurring filter of DNGMonochrome in a next version.

Monday, October 20, 2014

In the subway - I

Tokyo, Japan, 8 October 2014

Click on photo for the full version...

Sunday, October 19, 2014

Traditional

Dressed up for a wedding in the park...

Tokyo, Japan, 7 October 2014

Click on photo for the full version...

Saturday, October 18, 2014

Riksja

In Asakusa... these riksjas are being pulled by tall and fit looking Japanese guys with strange footwear (shoes shaped as reindeer hoofs)... They also act like a tour guide and will tell you some facts about the area and stop at the landmarks...
The old women didn't seem to be that interested though, but who can blame her...

Tokyo, Japan, 9 October 2014

Click on photo for the full version...

Friday, October 17, 2014

Selfie

The 'selfie stick' in action...

Tokyo, Japan, 7 October 2014

Click on photo for the full version...

Thursday, October 16, 2014

Spider

You see them in parks... they are big and look vicious, and they wear a black and yellow wasp suit - adding to the concern - but I have no idea if they're actually dangerous... Tokyo Tower in the background...

Edit: after some research I think it's a Nephila clavata. Its bite is not lethal apparently, just gives some blistering and local discomfort for about 24 hours. But don't take my word for it, I'm no spider expert, and I'm still unsure if I have the right one...

Tokyo, Japan, 9 October 2014

Click on photo for the full version...

Wednesday, October 15, 2014

Fashion - I

In Shibuya

Tokyo, Japan, 12 October 2014

Click on photo for the full version...

Monday, September 29, 2014

DNGMonochrome 0.9.81 released

See the previous post for the big changes in 0.9.8

0.9.81 contains one bug fix.

  • After changing brightness or contrast on the preview image, and then clicking the 'noise reduction and deblurring' button under 'Tools', the image in the main screen (underlying the Tools window) would distort. This had no effect on the conversion and was just a visual bug.

Download

You can download the new version of DNGMonochrome here.

Sunday, September 28, 2014

DNGMonochrome 0.9.8 released

Ok, let's not go into the why it took so long, but just present this new version.

New in version 0.9.8
  • Drops support for Windows XP. Version 0.9.72 will stay available, but 0.9.8 is not supported anymore on XP
  • Drops the sharper setting. Already not as effective anymore due to algorithm changes, it also gave unsatisfactory results on photos with higher pixel counts. The positive effect still left was easier to reproduce with a bit of sharpening in the RAW developer
  • Adds deblurring option through Fast Fourier Transform and Wiener filtering
  • Adds support for the Leica T
  • Adds support for the Canon EOS 550D and EOS 30D (for DNGs produced with Adobe DNG converter from CR2 files)
  • Adds support for the Nikon D200, D800 and D800E (for DNGs produced with Adobe DNG converter from NEF files)
  • Adds support for the Sony A7s (for DNGs produced with Adobe DNG converter from ARW files. Note that you might need a recent version of Adobe Converter for ARW files. Also note that currently the Sony A7 and Sony A7r are not supported)
  • Adds a 'no interpolation' option for modified color cameras that have their Bayer filter removed. These cameras produce a monochrome luminance file but at the same time the file still holds parameters indicating it was shot with a color camera. This then leads to trouble in RAW converters, since the RAW converter is assuming it's a color photo. Using this new 'no interpolation' option will lead to an non-interpolated monochrome DNG and stop the RAW converter from interpolating.
    Do not use this option on color DNGs from regular color cameras.
  • Changes the G1G2 correction to a more intelligent approach (G1G2 correction only applies to the Leica M8, Leica M9 and Nikon D200)
  • Adapts the preview image to respond much faster (and smoother) to brightness changes (through the brightness slider)
  • Adds a contrast slider for the preview image
  • Fixes bug: changing gamma would not work in the cooked preview mode
  • Fixes bug: after using the RGB filters in combination with gradient filtering (set to right to left or bottom to top), switching off the gradient and processing the photo again would lead to a regular photo and not an RGB filtered one.

Deblurring

I guess the biggest new thing is the deblurring filter, although I myself do have some reservations about the usefulness, it does deliver on some of my own photos. You can read more about it here, with a short description (no visuals) how to work with it.


Download

You can download the new version of DNGMonochrome here.

Thursday, October 17, 2013

Blurry vision IV

And another highlight today...

Apart from the deblurring in DNGMonochrome - which will be in the next release - as written in previous post, I also got interested in deblurring color DNGs, whilst keeping them 'RAW': not deblurring the exported end result (usually a JPG), but deblurring the DNG before it's developed. That way you won't have to go back to the deblur software each time you decide you want something changed in the DNG.

That all worked better as expected, as shown also in previous post.

I then set out to program a new piece of software, called DNGDeblur, specifically for color DNGs (although it can also deblur monochrome DNGs). However, when putting it all together, it turned out the deblurring of the color DNGs was tediously slow when they get into the size of the Leica M DNGs. Took my reasonably fast system some 8 minutes per M-photo. The Canon 5DII and 5DIII a similar story. They all have a width that goes beyond 4096 pixels, which means the width and height doubles to 8192 by 8192 values, since the FFT needs a power of two to work properly. But since that actually quadruples the total amount of values (compared to a 4096 by 4096 for say a Canon 40D DNG), the time it takes also quadruples.

Having solved the huge memory demands, I was now doubting the whole endeavour on account of speed. Waiting 8 minutes per photo... not very practical.

Then, after already cutting the 8 minutes back to 5 minutes per photo, by smartening up the software, today I finally had the right idea.

The whole procedure for a color DNG is now as fast as the one for a monochrome DNG. The M DNGs take around a minute (70 - 80 seconds), and a Canon 40D color DNG is processed in 20 seconds. This will eventually slow down again a bit, since I still need to implement some additional procedures, and on slower systems it will obviously be slower, but I hope to stay at least under 2 minutes per DNG on my own system, which is quite an improvement compared to the 8 minutes I started with.

I can't put a release date on this software yet, but I hope to have it ready within a few weeks...

Sunday, September 29, 2013

Blurry vision III

And a small victory today...

On a side track I've been testing color DNGs, to figure out if it is actually possible to deblur a RAW file in stead of an exported JPG. I couldn't find a theoretical reason why not, but seeing that a DNG still needs to be interpolated, I did wonder if filtering the RAW values like the deblurring does, would lead to any problems.

Basically I'm using the engine of DNGMonochrome: interpolate the three color planes (green, red and blue), deblur all the color planes with the same kernel, then write back the DNG as a RAW file, with the replaced pixel values for green, red and blue. Producing what I was looking for: a deblurred - non interpolated - RAW file.

Deblur first, develop later.

First attempts were rather horrendous, but today I had some success.

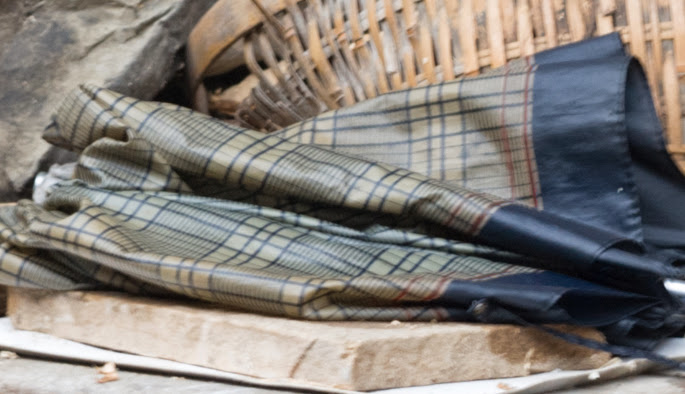
It's the same umbrella - from my previous post - but now in color. The 'deblur' is slightly less spectacular, but that's because I'm currently deblurring on a preview of the grayscale version of the photo. I haven't implemented a color preview yet.


Small crop from a blurred Canon 40D photo... Move over the image with your mouse to see the blur corrected version... JPG produced from a deblurred DNG...

Saturday, September 28, 2013

Blurry vision II

Making some progress with the deblurring. I haven't shown you any shots of the user interface yet, because that's still unfinished, although it is getting closer to a presentable version. In general I'd say that if you'd like to use this in a next version of DNGMonochrome, be aware it's not a one-click solution. Some photos really require some effort to get to an acceptable result, and the method itself will never lead to 'perfection'. It's simply not possible (I think) to filter photos like this without some downsides (as in additional artifacts thrown in for free). Personally I think this method is only useful if the blur isn't too extensive.

Here's another quick example...

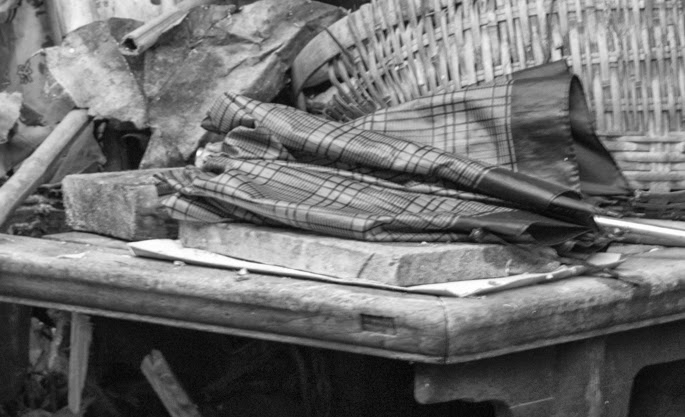
Blurry original... (no mouseover on this one, see the crops below...)


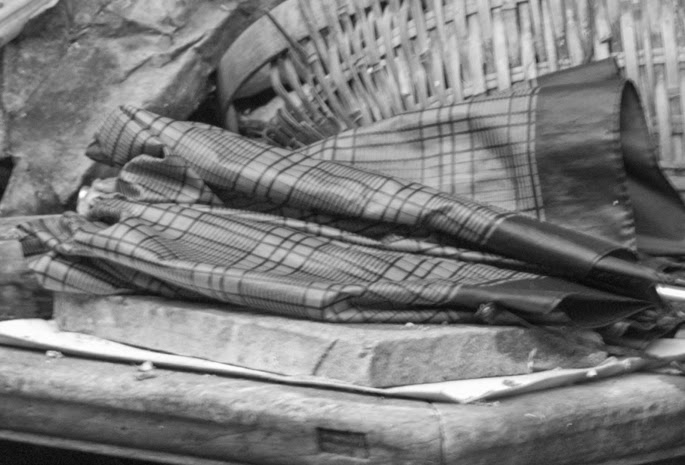
Small crop from a blurred Canon 40D photo, converted with DNGMonochrome... note that this is a real life shot, not some fake blurred image... the monochrome DNG was then developed in Lightroom, with no sharpening and no noise reduction. Move over the image with your mouse to see the blur corrected version produced by DNGMonochrome, which got exactly the same treatment in Lightroom (no sharpening nor noise reduction)...


Same as above, but an even smaller piece of the photo... move over the image with your mouse to see the blur corrected version produced by DNGMonochrome...


Same as above, but now the blurred original was sharpened 70% in Lightroom... as you can see - for the more doubtful - the deblurring isn't comparable to sharpening... Move over the image with your mouse to see the blur corrected version produced by DNGMonochrome (which was not sharpened)...

Thursday, September 26, 2013

Blurry vision I

Ok, well, this is not really about blurry vision, more about blurry photographs, and the methods to get rid of that blur.

I've been experimenting a bit with it in DNGMonochrome.

There's several solutions available (in software) out there, to deblur photos. Be it motion blur (camera shake) or blur due to focus errors. But the problem with those solutions (some are actually quite good) is that they only work on the finished end product. You have to export your RAW or DNG first to JPG or PNG, then deblur that photo.

I find that rather tedious, because once you've done all that and you decide you still need to make some adjustments to the RAW photo in e.g. Lightroom, you have to go through the whole process of deblurring the final export again. I regularly go back to older DNGs or CR2s and redo them. Software progresses, your own vision of how a photo should look might change, and then you still have to have the deblurring software around and remember the settings for that particular photo. It's just not very convenient.

I think this deblurring should take place on the DNG or the RAW file, before you start working on it in your RAW developer. Problem is: so far I haven't found software that actually tackles the RAW file.

So, introducing the blur/deblur filter in DNGMonochrome, with plans to extend it to color DNGs. Deblur first, then develop, in stead of develop, deblur afterwards.

Yes, ok, but wait...

How does this work?

Well, it works.

Let me show you...

Move over the image with your mouse to see the difference...

Small crop from a slightly blurred Canon 40D, most likely a focus error, converted with DNGMonochrome... note that this is a real life shot, not some fake blurred image... the monochrome DNG was then developed in Lightroom, with no sharpening and no noise reduction. Move over the image with your mouse to see the blur corrected version produced by DNGMonochrome, which got exactly the same treatment in Lightroom (no sharpening nor noise reduction)...

As you can see - although this example is quite subtle, I don't have many blurry real life shots, because I usually throw them - it really works.

The deblurring filter uses a Fourier transform of the photo (essentially this means the photo is split up in two separate collection of numbers, both belonging to the frequency domain: one collection is called the spectrum and the other is called the phase). After the Fourier transform the transformation is filtered using a second Fourier transform of a so called 'kernel'. That actually causes the blur / deblur to take place (I'm still working on the user interface of that one, because currently it's simply a free block you can click in to create the kernel). Then the Fourier representation is transformed back to the original photo.

One of the biggest issues I had to solve was the memory demand of this transform. The Fourier transform requires a huge amount of memory for the bigger photos. For your average M9 DNG we're talking 16 bytes per number (a real number and an imaginary number, 8 bytes per piece), times the size of the closest power of 2 of the longest edge of the photo. In case of the M and M9 that's 8192 by 8192. Now multiply that (8192 times 8192 times 16) and you get a whopping 1073741824 bytes (roughly 1 gigabyte).

Then for the kernel we need the same amount. And then for some nice laplacian filtering or some other additional goodies, we need a third transform.

So in total we're talking at least 3 gigabytes for an average deblurring action.

Now, I was able to cut that down to 1.5GB by changing the doubles to floats (going from 16 bytes per number to 8 bytes per number), but that still wasn't enough.

My 64-bit Windows system with 4GB of memory simply couldn't handle it. Small photos (as shown in the example) were fine. The bigger ones crashed the software.

Well, to cut a long and boring story short, I solved it with memory mapped files. Essentially cache writing memory to disk. It does slow down a bit, but it works. All the huge DNGs now deblur without memory problems, at least on my system :-)

This whole thing isn't finished yet, there's more experimenting, but I will try to keep you posted and show you some more examples when things progress...

Wednesday, September 11, 2013

DNGMonochrome 0.9.72 beta released

No spectacular changes in this release, but it does come with some new stuff.

New in version 0.9.72
  • Fixes some very minor bugs in the user interface, which didn't affect the conversion.
  • Makes some small adjustments to the GreenSplit implementation of previous version, improving fine detail in darker areas.
  • Improves the red and blue conversions. Especially the red conversion could suffer from a zipper like artifact, visible mostly on highlighted edges with bright red background. This started showing in some photos around 200 to 300% magnification.
  • Improves the algorithm by applying a localised minimum and maximum during interpolation, which helps especially the very noisy photos and improves the outcome of the algorithm when used together with the 'sharper' setting.
  • Adds code to enable this version to function with the new Lightroom plugin. The plugin installs through the regular installer, together with DNGMonochrome 0.9.72 (only for Windows Vista / Windows 7 and Lightroom 4/5).
  • Brings back the strength setting for RAW red and RAW blue filtering, which was dropped too hastily in an earlier version... strength has the same range (steps of 5%) as the RGB filters... if you want to get to the RAW red or RAW blue results version 0.9.71 produced, push the strength slider to 100%.
  • Adds a manual 'Update check' through a new button in the main screen... it will tell you if there's a new version available, provided you're online.


Lightroom plugin

If your work flow is based on Lightroom, the new plugin can be quite a help. It can be installed by choice (it's in the 0.9.72 installer, you don't have to download anything else... turn it off during installation if you don't use Lightroom, although installing it anyway won't harm).

A few notes:
  • The plugin is more or less beta. This is my first Lightroom plugin, so be gentle if it doesn't work on your system as intended. Please try it out on some backup DNGs first and make sure it works properly! DNGMonochrome contains safeguards to avoid ever overwriting an original, but nevertheless, convince yourself first it works as intended.
  • The plugin will not work with older versions of DNGMonochrome: you need to install it together with at least version 0.9.72 - the plugin is embedded in the installer of DNGMonochrome.
  • The plugin will not work with older versions of Lightroom (earlier than version 4).
  • Lightroom 4 doesn't work on Windows XP, so if you're on Windows XP, this plugin won't be very useful. Also, since DNGMonochrome itself was adapted to work with Lightroom, the XP version now has a separate installer. Pick the right one on the download page since the Vista/Windows 7 version of DNGMonochrome will not work on XP.
  • Do not change the folder of DNGMonochrome (usually under Program Files) or move it to another location after installation: the plugin will get lost. If you need or want to install DNGMonochrome in a different folder, do it during installation, when the installer asks you for the installation path, or - if you want to change it after installation - uninstall DNGMonochrome, then reinstall and change the installation folder during installation (and be sure to include the plugin in the re-installation).
After installation, start up Lightroom, select a color DNG and look under the Help menu in Lightroom. There should be an entry called 'Plugin extras -> DNGMonochrome -> Convert with DNGMonochrome'. If you select it, DNGMonochrome should start with the selected photo from Lightroom, and after conversion (you still have to press that button in DNGMonochrome!), the monochrome DNG is automatically imported into Lightroom, after being saved to the same folder as the original color DNG.

Note that if you're working from a 'last imported' folder within Lightroom, you might not see the imported monochrome photo. If that happens, go to the Library module and select the folder the original is actually in. Then you should see the monochrome version.

You can keep converting the original in DNGMonochrome (changing filters or noise reduction and reprocess) and every converted copy will be imported automatically. Close DNGMonochrome after you're finished, or select a different DNG in Lightroom and go to the Help menu again to select 'Convert with DNGMonochrome' once more. The already running version of DNGMonochrome will close automatically and a new one will open with your selected DNG.

Read more about this plugin here (about installing, using, turning it off or deleting it if you want to get rid of it).


Why the strength setting for RAW filtering?

Well, the reasons are a bit fuzzy, but in hindsight, the RAW filtering with strength is a very simple procedure compared to the more complex RGB filtering. I haven't extensively compared both results side by side, but I did notice that the RAW filtering with strength (after compensating for the loss of exposure in Lightroom) seemed slightly cleaner and less noisy than similar results with RGB filtering.

There are some distinct differences:
  • With RGB filtering you get the right exposure setting at every strength setting. Strength at 5% will give the same exposure as strength at 100%. With the RAW filtering, the stronger you filter, the more you have to compensate in your RAW converter for lost luminance.
  • RAW filtering doesn't care about white balance.
  • RAW filtering can not do a green filter.
  • Due to the loss of exposure it's not possible to use gradient filtering with the RAW filters. So if you only want to filter part of the photo, you'll have to use the RGB filters.


Download

You can download the new version of DNGMonochrome here.

Wednesday, September 4, 2013

Quick update

Yes yes, I know I have been a bit silent on the subject of DNGMonochrome, but not to worry, I haven't abandoned it. There will be a 0.9.72 soon (with Lightroom plugin, making it possible to convert from within Lightroom, and some other small improvements), and I still have some ideas to extend it. It's just that I have been quite busy the last few months doing other stuff, hence the silence...

Tuesday, September 3, 2013

Exhausted

Don't worry, he was still breathing... in a warm double decker tram, shot from a tram in front of it...

Hong Kong Island, Hong Kong, 21 August 2013

Click on photo for the full version...

Monday, September 2, 2013

Apartments

Apartments on Hong Kong Island near the east, Hong Kong, 23 August 2013

Click on photo for the full version...

Sunday, September 1, 2013

The Peak I

Shot from The Peak on Hong Kong Island, Hong Kong, 25 August 2013

Click on photo for the full version...

Saturday, August 31, 2013

It never stops

Hong Kong Island, Hong Kong, 21 August 2013

Click on photo for the full version...

Friday, August 30, 2013

Skyline

Kowloon, Hong Kong, 21 August 2013

Part of the skyline of Hong Kong Island, shot from the Kowloon side during light show...

Click on photo for the full version...